Blank walls don’t stay blank for long when a homeowner decides to take charge. Whether it’s a rental that needs personality, a bedroom that feels bare, or a living room lacking visual interest, DIY wall decor offers an affordable path to transformation without hiring a contractor or waiting weeks for delivery. Unlike major renovations, simple craft projects deliver immediate impact, often in a single afternoon, and they don’t require advanced carpentry skills or specialized tools. The beauty of DIY wall decor is that it’s forgiving: mistakes become character, and costs stay low when working with paint, fabric, and materials already in the garage or closet.
Table of Contents
ToggleKey Takeaways
- DIY wall decor transforms blank spaces affordably in a single afternoon without requiring professional contractors or advanced carpentry skills.
- Paint and stencil designs, fabric tapestries, and vinyl lettering are beginner-friendly DIY wall decor projects that cost under $50 and take 1–4 hours to complete.
- Oversized geometric art, gallery walls, and statement pieces create visual impact by combining multiple affordable materials and techniques arranged with intentional design.
- DIY wall projects allow complete customization of color, pattern, and scale to match your room’s proportions, lighting, and personal style far better than mass-produced alternatives.
- Renter-friendly options like peel-and-stick vinyl decals, fabric wall hangings with tension rods, and removable adhesive make DIY wall decor accessible without permanent wall damage.
Why DIY Wall Decor Is Worth Your Time and Energy
Taking control of wall decor delivers real rewards beyond just filling empty space. A custom wall project costs a fraction of store-bought art or wallpaper installation, especially when using materials already on hand. More importantly, it builds confidence: completing a painted accent wall or hanging a fabric tapestry proves that interior transformation doesn’t require professional help.
DIY projects also allow customization that mass-produced decor simply can’t match. A homeowner chooses the exact color, pattern, and scale to suit their room’s proportions and lighting. Because the work happens at home, on the homeowner’s schedule, there’s no waiting for shipments or coordinating contractor visits. Mistakes are learning opportunities, not expensive setbacks. Most wall projects can be repainted, rehung, or adjusted with minimal cost or effort.
Affordable Craft Projects for Every Skill Level
Simple Paint and Stencil Designs
Painted accent walls remain the fastest way to reset a room’s mood. A homeowner can prep, paint, and finish a single wall in 3–4 hours using standard materials: drop cloth, painter’s tape, primer (if needed), and quality latex paint. The secret is proper prep: clean the wall, fill holes, sand any glossy finishes, and tape corners cleanly. Use a roller on an extension pole for even coverage and fewer drips than a brush alone.
Stencil work adds pattern without the mess of wallpaper. Pre-cut stencils or homemade templates (traced from cardboard) work equally well. Stencil-specific paint (thicker than regular latex) prevents bleeding under edges. Tape the stencil securely, dab rather than brush, and peel it away while paint is still slightly tacky for crisp lines. A single stenciled wall feature takes 2–3 hours and costs under $30.
Wall decals and vinyl lettering offer an even simpler no-paint option. These peel off cleanly without damaging paint, making them perfect for renters. Quality matters: cheap decals tear during application, so invest in repositionable, rated vinyl from reputable sources.
Fabric Wall Hangings and Tapestries
Fabric transforms walls without permanent changes. A tapestry hung with a tension rod or heavy-duty nails creates an instant focal point. Inexpensive cotton fabric (muslin, quilting cotton, or bed sheets) stretched and stapled to a wooden frame costs under $50 and takes about an hour to assemble. Use a staple gun and work from the center outward, pulling fabric taut but not over-stretching.
Faux woven wall hangings combine affordability with visual impact. Strips of fabric, yarn, or even fabric scraps woven through a wooden dowel create a bohemian accent that’s trendy and temporary. Secure the dowel with strong adhesive hooks (rated for the weight) rather than nails. This approach is renter-friendly and takes 45 minutes to an hour.
Macramé or knotted rope wall hangings appeal to those wanting texture. Pre-made kits exist, but lengths of cotton rope knotted to a dowel cost even less. A simple wall hanging measures roughly 18″ × 24″ and weighs almost nothing, so mounting hardware stays minimal.
Statement Pieces That Make an Impact
Oversized geometric wall art elevates a room when executed cleanly. A homeowner cuts shapes from large sheets of colored paper or poster board, then arranges and adheres them to the wall using removable adhesive dots or low-tack spray adhesive. Triangles, hexagons, or interlocking circles arranged in a grid or asymmetric pattern read as intentional design rather than decoration. This technique works especially well above a sofa or bed and costs under $40 for materials.
Painted shiplap or board-and-batten accents mimic high-end finishes at DIY prices. Narrow boards (1″ × 4″ or 1″ × 6″ nominal pine or plywood) fastened horizontally and painted create texture and visual interest. If walls allow fastening into studs (check for wiring and plumbing first), this project is permanent and professional-looking. If renting, adhesive-backed peel-and-stick shiplap panels offer a temporary alternative, though durability varies by product.
Three-dimensional paper or cardboard wall sculptures, think geometric flowers, layered leaves, or abstract shapes, create shadow and depth that flat art can’t match. These are best suited to protected walls away from traffic, as they’re delicate. A single installation might take 2–3 hours but becomes a room’s talking point. Cost depends on materials: craft paper, cardboard scraps, or even newsprint keep expenses low.
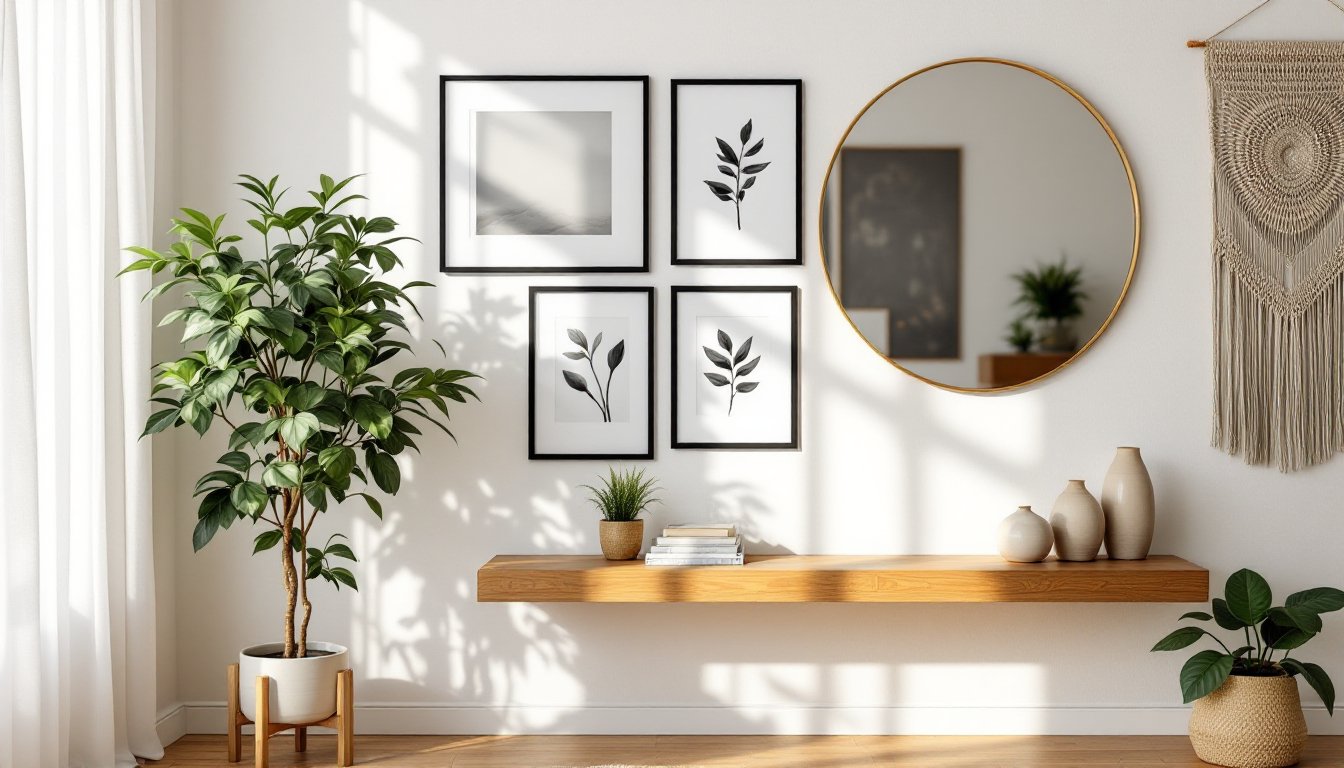
Gallery walls, a curated mix of framed prints, photographs, and art, remain timeless. The trick is a solid layout before hanging anything. Lay pieces on the floor, arrange them, then photograph the arrangement. Use painter’s tape on the wall to mark nail positions, ensuring straight lines and consistent spacing. Mix frame sizes and finishes for visual interest, and leave 2–3 inches between frames. This approach accommodates personal photographs, creating a deeply customized feature wall that evolves over time.
Conclusion
Wall decor projects prove that transformation doesn’t require months, contractors, or excessive budgets. Whether through paint, fabric, or statement pieces, a homeowner can reshape any room in a weekend. Start small, a stenciled accent, a tapestry, or a gallery wall, to build confidence, then layer in more ambitious projects. The real reward isn’t just the finished look: it’s the satisfaction of taking control and discovering that DIY wall decor is entirely achievable.