A fireplace isn’t just a heat source, it’s the anchor of any living room, and the trim around it sets the tone for the entire space. Whether a homeowner is updating a dated surround or framing a new insert, fireplace trim ideas offer a chance to elevate that focal point without a full renovation. From classic moldings that whisper sophistication to modern minimalist lines that speak clean design, the right trim choice ties a room together. This guide walks through proven styles, practical material options, and installation tips to help anyone tackle this high-impact project with confidence.
Table of Contents
ToggleKey Takeaways
- Fireplace trim ideas range from classic layered moldings to modern minimalist designs, each offering a distinct way to elevate your living room’s focal point without a full renovation.
- Classic molding styles use crown molding (3-6 inches wide) and pilasters with profiles like dentil or ogee, while modern trim favors thin 1-2 inch flat boards or floating surrounds that create clean lines.
- Shiplap with board widths of 4-12 inches adds rustic charm and texture, requiring kiln-dried lumber and installation perpendicular to the fireplace opening with proper gaps for expansion.
- Stone and tile surrounds demand cement backer board, quality thinset mortar, and proper sealing, with projects typically taking 3-5 days and costing $15-$50+ per square foot.
- Paint color and finish selection—whether bold deep charcoal or neutral white—should align with your home’s architecture, with high-quality trim paint and multiple thin coats ensuring durability and even coverage.
- Proper surface prep, primer application, and sealing are critical steps that prevent costly mistakes and ensure your fireplace trim maintains its appearance and value for years.
Classic Molding Designs for Timeless Elegance
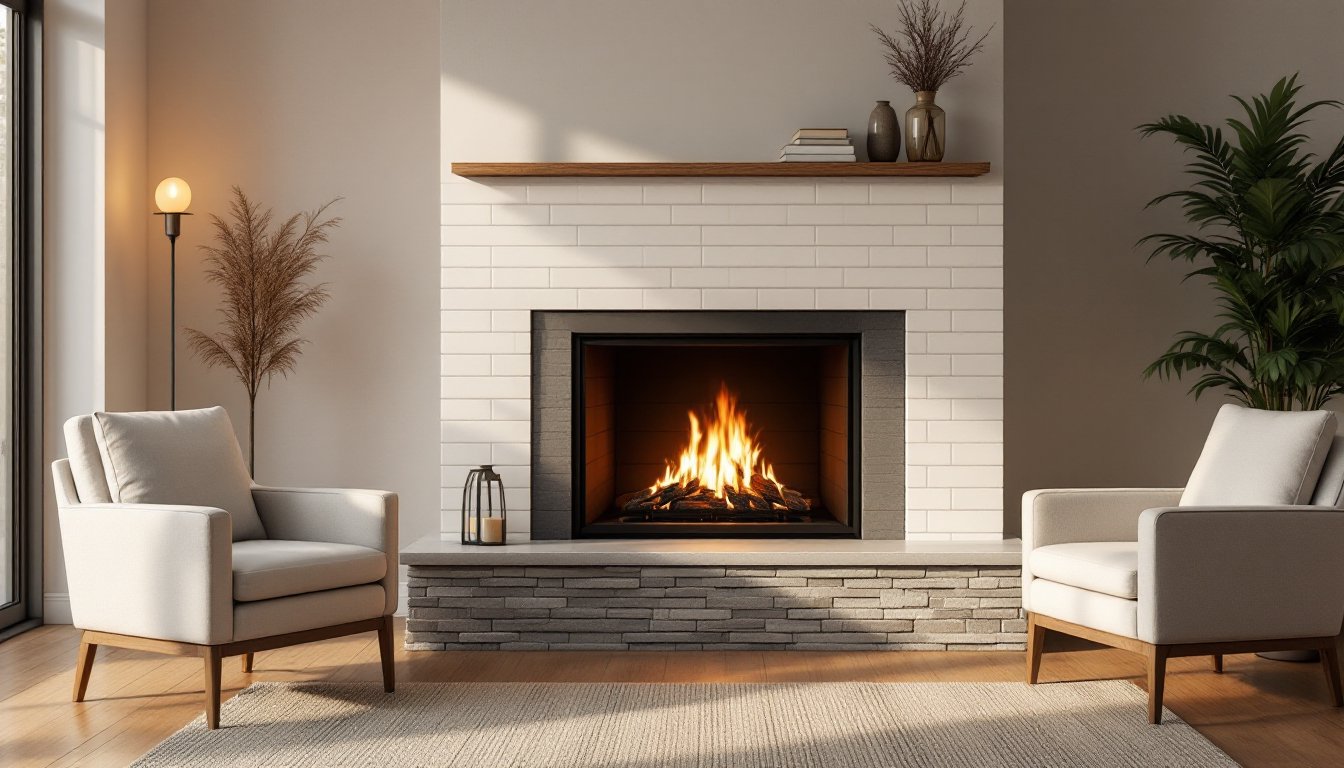
Classic fireplace trim centers on layered moldings that frame the opening and surround with detail and depth. Think crown molding running horizontally above the firebox, combined with pilasters (vertical trim strips) flanking each side, often paired with a substantial apron or skirt board below the hearth. These designs work especially well in traditional, farmhouse, and colonial-style homes.
Common molding profiles include dentil (a repeating block pattern), egg-and-dart (oval and pointed alternation), and ogee (an S-curve profile). These aren’t just ornamental, they catch light and shadow, giving the trim dimension even when painted a single color. Standard crown molding for a fireplace surround ranges from 3 to 6 inches in width, while pilasters run 4 to 8 inches depending on the opening size.
Material options here include solid pine, poplar, or MDF (medium-density fiberboard). Pine is traditional but splinters and dents easily: MDF resists warping and takes paint smoothly but isn’t ideal near actual heat. Many DIYers combine both, MDF on lower sections where moisture and bumps happen, solid wood higher up. Caulk all seams, sand between coats, and prime before painting to avoid blotchiness in stain absorption. Expect 2 to 3 days for a single fireplace trim-out, including drying time.
Modern Minimalist Trim: Clean Lines and Contemporary Style
Minimalist fireplace trim strips away ornament in favor of straight lines and negative space. A thin 1 to 2-inch flat board frame or a simple reveal (a recessed shadow line created by offsetting the surround plane) creates visual intrigue without fuss. This approach suits open-concept homes, mid-century modern aesthetics, and spaces where the fireplace surround itself, whether stone, tile, or concrete, is the star.
One popular method is the floating surround: a gap of 3 to 6 inches between the trim and the walls, creating a floating effect that feels contemporary and reduces the visual weight of a large opening. Another option is a shadow line, a 1/2-inch recessed groove routed into the trim board, creating a subtle 3D effect without protruding elements.
Material choices lean toward hardwoods (walnut, oak, white oak) stained to match cabinetry, or powdercoated steel for an industrial edge. Painted white or soft grays also keep the look clean. Installation is straightforward: measure carefully, use a miter saw for precise angle cuts, and fasten with finish nails or pocket holes to hide hardware. Sand, seal (if staining), and finish. Plan on 1 to 2 days for a basic trim-out in this style.
Shiplap and Rustic Trim for Cozy Cottage Charm
Shiplap, horizontal boards with interlocking edges, has become a go-to for fireplace surrounds seeking warmth and texture. The overlapping planks create shadow lines and visual rhythm, and because they’re tongue-and-groove (or rabbeted), they sit flush against each other. Shiplap reads rustic or farmhouse depending on board width, finish, and the overall room.
Board widths range from 4 to 12 inches, and standard 3/4-inch thickness works for most surrounds. If the fireplace surround absorbs heat (i.e., it’s directly against the firebox), use kiln-dried lumber that’s been acclimated to the home for at least 48 hours to prevent warping. Install shiplap perpendicular to any fireplace opening, usually starting at the bottom and working up. Use a finish nailer or brad nailer (1.5 to 2-inch nails), one fastener per board into studs or blocking behind. Stagger seams so no two boards butt end-to-end, and leave a 1/8-inch gap for expansion.
Weathered Wood Options
Weathered or reclaimed shiplap adds authentic character but requires careful vetting. Salvage yards often stock genuine barn wood, though it costs $5 to $15 per square foot, triple the cost of new kiln-dried shiplap. Check that reclaimed wood is structurally sound and free of active pest damage. New shiplap can be aged using whitewash, wire-brushing, or hand-planing before installation. A pickled or weathered gray finish pairs well with modern cottage interiors.
Stone and Tile Accents for Luxury Finishes
Stone and tile elevate a fireplace surround into a statement piece. Marble, limestone, slate, granite, and engineered stone each bring distinct character. Tile offers more flexibility in color, pattern, and scale, subway tile, herringbone, large-format porcelain, and hand-painted ceramic all work depending on style.
For new installations, a proper substrate is critical. Cement backer board (not drywall) is mandatory behind tile in any area exposed to direct heat or moisture, use 1/2-inch thickness minimum. Apply thinset mortar (specifically rated for the stone or tile type and your climate), press each piece firmly, and maintain consistent grout lines. Seal natural stone with an appropriate sealer before grouting: some porous stones stain easily. Grouting itself demands patience: allow 24 hours cure before applying grout, then another 48 hours before sealing grout lines.
Safety note: Wear N95 or higher dust mask when cutting stone or tile, silica dust causes serious lung damage. Use a wet saw whenever possible to minimize airborne particles. Expect 3 to 5 days for a tile surround when accounting for substrate prep, tiling, grout cure, and sealing. Budget $15 to $50+ per square foot depending on material grade and whether you’re DIY-installing or hiring.
Color and Paint Choices to Enhance Your Fireplace
Paint color can either recede the trim (making the fireplace opening feel larger) or frame it boldly. White, cream, and soft grays are neutrals that work anywhere, but don’t overlook warmer options. Deep charcoal, navy, or warm taupe make the fireplace feel like a jewel box, especially with polished brass or black hardware.
For painted trim, use high-quality interior trim paint, oil-based or acrylic latex, rated for durability. Apply primer first, especially on MDF or stained wood: two primer coats beat one thick coat. Sand lightly between primer and paint, and between paint coats. Aim for three thin coats rather than two heavy ones to avoid drips and ensure even coverage.
If staining wood trim, test on scrap first. Stain color varies wildly by wood species and grain: pine takes stain unevenly (use conditioner), while oak and poplar accept stain more predictably. Seal with matte, satin, or glossy polyurethane depending on the look and durability needed. High-traffic areas (like a fireplace that gets touched often) benefit from satin or semi-gloss polyurethane (two coats minimum) to resist marks. A matte finish feels more modern: gloss reads traditional. Allow full cure (often 7 days) before heavy use.
Conclusion
Fireplace trim transforms a functional opening into a focal point that anchors the room. The right choice, whether classic molding, clean minimalism, rustic shiplap, or luxe stone, hinges on personal style, the home’s architecture, and the time and budget available. Measure twice, prep surfaces carefully, and don’t skip primer or sealing. A well-executed fireplace surround pays dividends in both aesthetics and home value for years to come.